Showing posts with label koi tile mural. Show all posts

Monday, March 9, 2020

Tile Mural, Small Side Fired

Koi Mural, small side fired

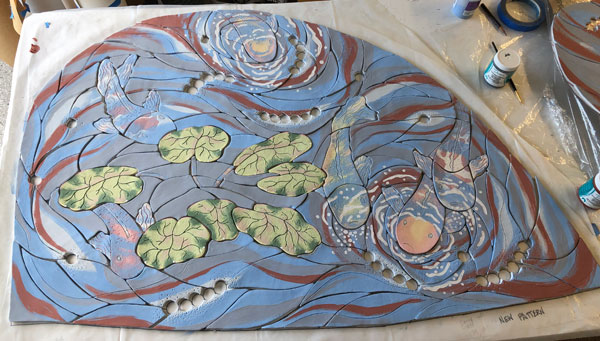
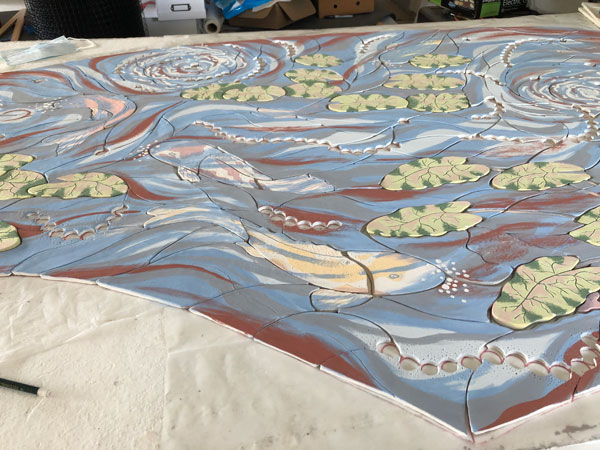
I've spent this week putting clear glaze on the tile pieces and fired them.  I've finished firing the small side.  It really feels good to be this far along on the project.  Here  is a pic to remind you of what it looked like before it was fired.

The rust color in the water has now turned green, although it is very subtle, and the gray had turned a dark blue.  I'm very happy with the result!

I have found someone to do the cement base for this project.  It is supposed to rain for a week so I should be getting that done about the same time that I finish firing everything!


Monday, March 2, 2020

Koi Tile Mural

Tile Mural
Image size, huge!
Glazed tile
I can't believe that I've finally finished painting this project!  I'm so excited (and scared) to start firing the pieces.  The large side is 12' long and almost 4' wide at the widest point.  The small side is about 36" x 30".  The colors are very pastel now but will be darker and more intense once they are fired.  The rust color in the water is actually a translucent green and the gray color is dark blue. I don't know if the green will even show up once it is fired.  Hopefully, I will like the total effect of the mural when it is finished!  

My next step is to add a clear glaze to each piece and begin firing them.  I think I will need to do about 15 firings because my kiln is small.  That's assuming that I like the outcome the first time.  Each firing takes about 6 hours to get up to temperature and twice that long to cool down so I can do 1 firing a day.  I only run the kiln if I'm home so I'll see how long this takes.  If I need to re-fire any pieces it will take even longer.

Below are close up pictures of the mural.
Small side
This should look very similar to the practice mural I posted a few weeks ago.  The fish and lily pads are in the same place but I made straight sides so that it can be hung as a painting.

The following pictures are of the large side going from left to right.  


Monday, January 27, 2020

Practice Koi Tile Mural II

"Practice Koi Tile Mural II"
Image size 18" x 36"
Glazed Ceramic Tile
I decided that my tile painting had too many middle values, so I overpainted a lot of the background to give it more punch.  I'm much happier with it now.
Here's how it looked last week:
Which do you like better?

I've been painting the small side of the tile mural for my backyard.  I have painted the background color for the water as well as the lily pads and most of the fish.  I won't add the other colors in the water until the big side is painted up to this same point.  I want to paint the added colors in the water on both sides at the same time so that they will read well together.  

All of the pieces for the large side are scrubbed (to get all of the clay dust off of them) and laid out (again) on the paper pattern.  That takes a while to do just that!  I'm excited to finally be ready to paint the big side.  It will probably take another 3-5 weeks to finish that.  Then, after I paint the extra colors in the water on both sides, I will add a layer of clear glaze to all of the pieces (about 550) and start the firing process.  I can fit about 50-60 pieces in my kiln for each firing.

Monday, January 20, 2020

Practice Koi Tile Mural

"Practice Koi Tile Mural"
Image size 18" x 36"
Glazed Ceramic tiles

I finished painting the practice painting that will lead me into painting the huge tile mural for my yard.  I was really nervous about finally painting the clay because I didn't know how it would turn out.

I don't know if you can see in this photo, but two of the lily pads have the dark green veins oozing and they look really bad.  Also, I added a dark green around the edges which doesn't show because the glaze that I used was too transparent.  I wasn't sure if I could add more glaze and refire but decided it was worth it to try.  

I used my Dremel tool to grind the dark green glaze that had oozed out of place by the veins on the lily pads.

Then, I repainted the same background color over the areas that I ground. These are two different lily pads.
You can see how different the color looks before it is fired.  I also painted a different dark green around the edges but didn't take a picture of that before I fired it.

Here is a picture of a portion of the painting showing the newly fired lily pads.
I'm also not entirely satisfied with the color in the water.  I think it needs to have more really dark areas and also some greenish color.  This week, I think I will add some glazes to the water and see what happens.

Knowing that I can add glaze and change things really reduces my sense of anxiety about painting the real mural.  I'm very happy that I had this smaller version to use for practice.

I've started painting the small side of the mural.  It will take a while!

Monday, October 28, 2019

Italian Vista

"Italian Vista"
Image size 14" x 8.5"
Acrylic on rice paper

I had a piece of paper that was covered with an interesting rice paper that I found in my studio.  I had added some initial colors a long time ago.  I decided to see what could be done with it and this is what I painted.  I really like the texture of this rice paper.  It looks like it has short sticks in it, which adds a lot of interest to a painting.

I used acrylics I thinned to a consistency a bit thicker than watercolor and began adding layers of color.  The underlying colors still show through, which give it a bit of a dull look.  Usually, I wouldn't like that since I really love bright colors, but it seems to fit this scene.

Finally, on my tile mural, I can see the light at the end of the tunnel.  I have only 16 pieces left to cut on the large side and have bisque fired almost 200 pieces.  In the pictures below, the white pieces have had their first (bisque) firing and are ready to glaze (paint).  I still need to carve a lot of the pieces to fit before I can continue firing, but it feels like the cutting will be finished soon.  I have to cut about 60 pieces on the small side, but I'm hoping to have all cutting and fitting for both sides finished by next week.


Monday, August 26, 2019

Palette Knife Wave

"Palette Knife Wave"
Image size 4" x 6"
Water Miscible Oils
This is another palette knife painting.  I love the texture and movement that can be achieved with the palette knife.

I spent a lot of time this week working on my clay mosaic mural.  I made a decision that will make it take a lot longer to finish it though.
I decided to re-cut the entire small side that shrunk so much, rather than trying to make it work by recutting some pieces and using some of the smaller pieces.  Also, I decided that the fish on this side were much smaller than on the larger side.  I guess I was paying more attention to how they fit into the smaller space when I designed it rather than having the correct scale to go with the larger side.  
I am using about half of the original pieces to make a mosaic painting that can hang on a wall.  I decided that it would be a good idea to be able to glaze a smaller version of what I'm doing to see how it turns out rather than glazing (painting) my huge mural and not being happy with the result.  Since it is hard to know how it will look once it is fired, I feel more comfortable having a trial painting.  So, maybe it's a good thing that the pieces shrunk so much.  I probably wouldn't have thought to do a trial painting otherwise.

I could have used more of the original pieces for this painting, but I decided that I didn't want the glass circles in this one.  I ended up cutting new pieces for about half of it.  I also moved one of the fish closer in so that he would be in this painting. When it is finished, it will be 18" x 36".  I'm a little worried about how heavy it will be, but I don't think it will be more than 50 pounds.  There are hooks for 100# paintings, so I should be okay.
Here is a picture of it showing the original pieces that will be used.  I have cut out the rest of the pieces and they are drying.  
So, this will probably add a couple of weeks to the finish date of the big mural for my yard.  It doesn't really matter.  Since it's for me, there is no 'finish by' date.  I'm usually just happy if I actually finish any project that is for me.


Related Posts with Thumbnails